Previous Artical AWS and Docker
Github AWS-EC2-DOCKER
Docker version: 25.0.13
Basic Command
Docker basic command
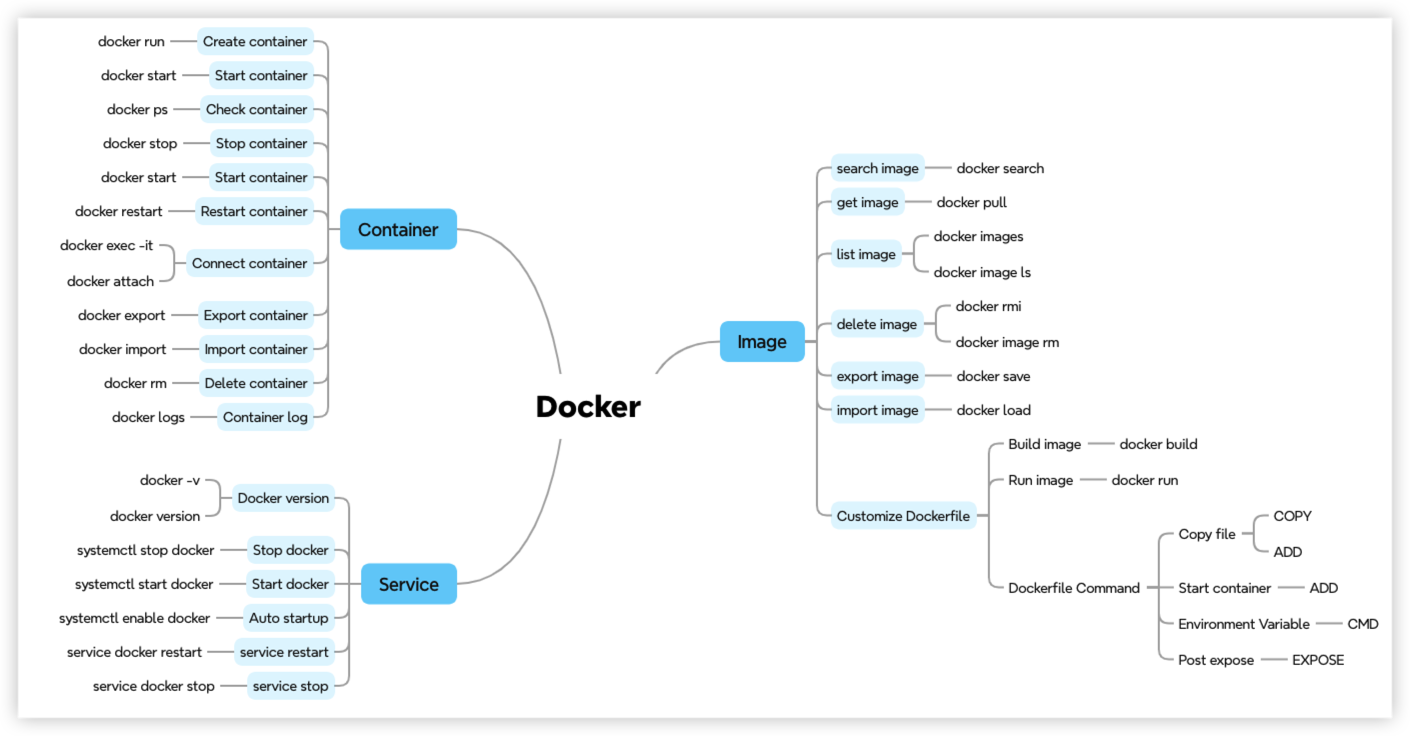
Dockerfile command
- FROM - Specifies the base image
- RUN - Executes commands, installs programs
- COPY - Copies files
- ADD - Supports downloading from URLs, extracting archives, and copying
- EXPOSE - Defines port mapping
- CMD - Specifies the program to execute
- ENTRYPOINT - Specifies the executable program; the default is
/bin/sh -c. Typically used mutually exclusive with CMD.
Build Example
Quick start: build up a image for stress-ng
Stress-ng is a powerful command-line tool to test Linux server workload. It support many different testing scenario like CPU, memory, I/O and file systems.
Firstly, upload the dockerfile to AWS EC2.


Run below command to build docker image
1 | cd /opt/app/docker/ |
Image should be created, run docker images to perform health check.

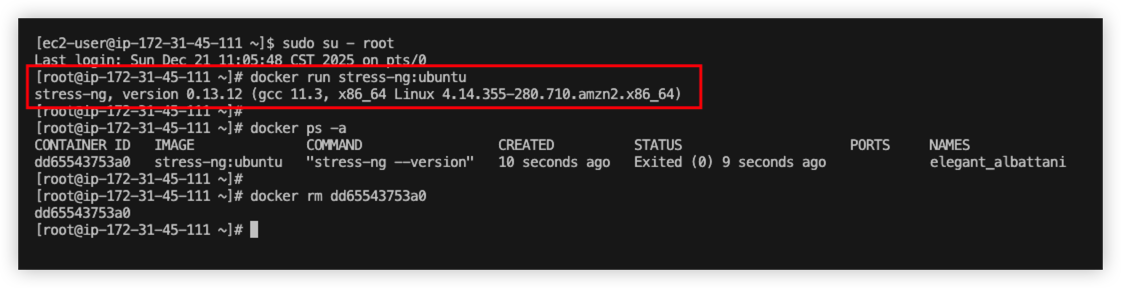
Run below command to start the container
1 | sudo su - root |
From the result, we can see the container started, and it echo the current version.
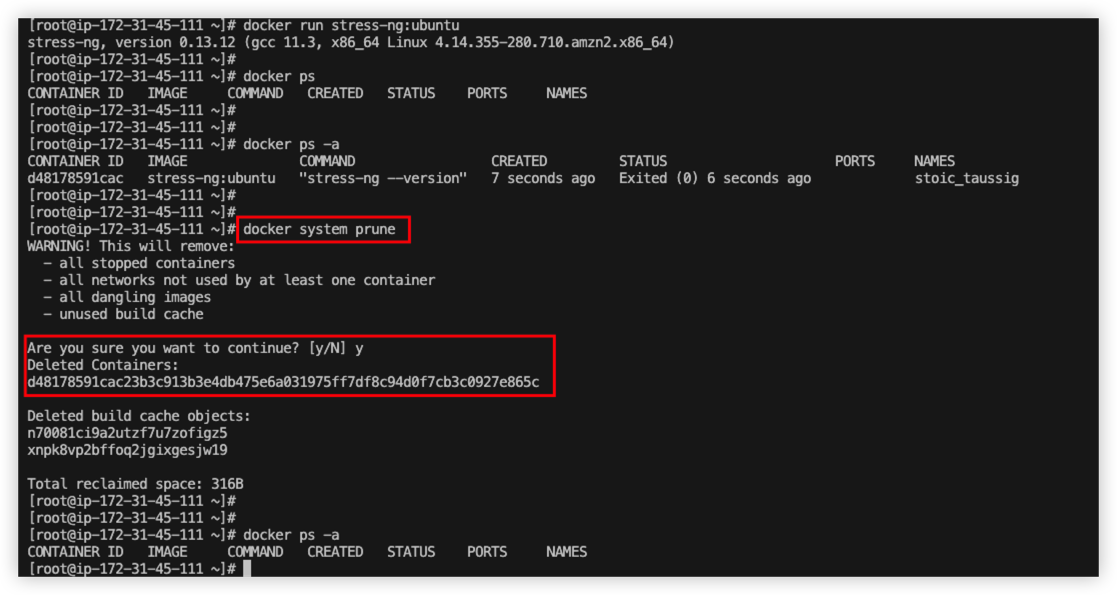
Enhance the docker image, make sure new image accept arguments passed by user.
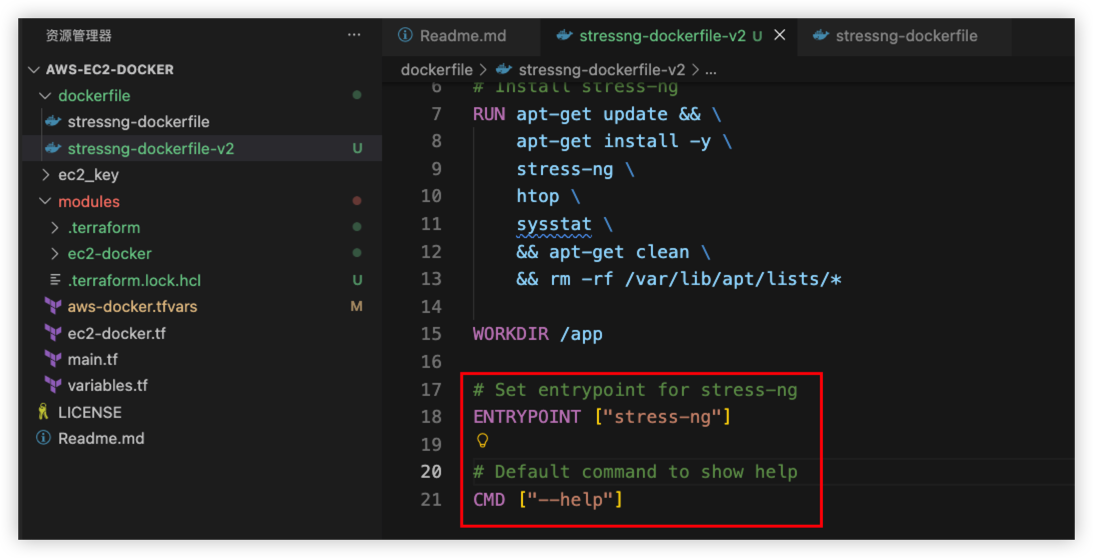
Follow the same procedure, create a new docker image for v2 version.
1 | cd /opt/app/docker/ |
Docker Images
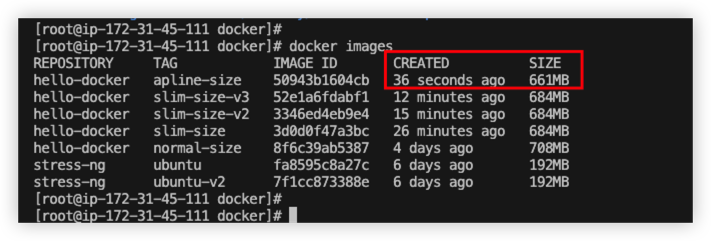
Smaller Images
From the first docker example, both v1 and v2 version using ubuntu as base image.
The total docker image size is 192MB.

Is it possible to make the image smaller?
Yes. Creating a smaller image is achievable through several key strategies.
We can specify the basic image version as below:
- slim: a smaller version compared with origin
- apline: tiny version, but it’s not include some C library.
- distroless: provided by Google, only have runtime and application to avoid shell attack
- scratch: totally an empty image, it’s safely image withou
exec. Developer can’t access the container at all. It’s mainly to build immutable runtime in docker.
*If we want our application much safer, then we should choose distroless or scratch
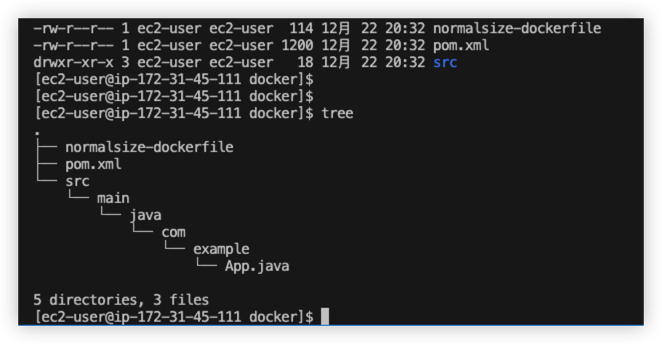
Example 1 - Try Java program with normal size
Below is application folder structure, the dockerfile is using eclipse-temurin:17-jdk
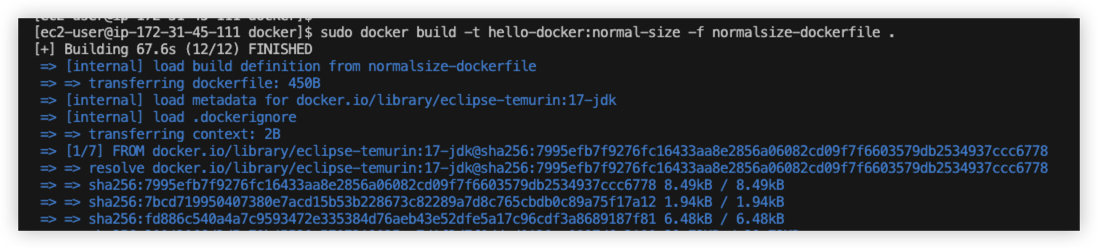
Upload source file to AWS EC2 and run command to build docker image
Build success, it took more than 1 minutes.
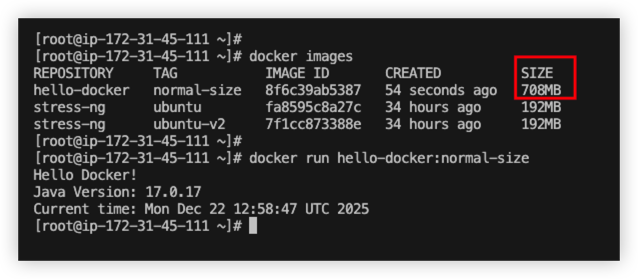
Try to run the images.
Now we can see the docker size is 700MB, and it works fine.
Example 2 - Try slim and apline
Modify the dockerfile, use slim version as base images.
1 | # Dockerfile - slimsize-dockerfile |
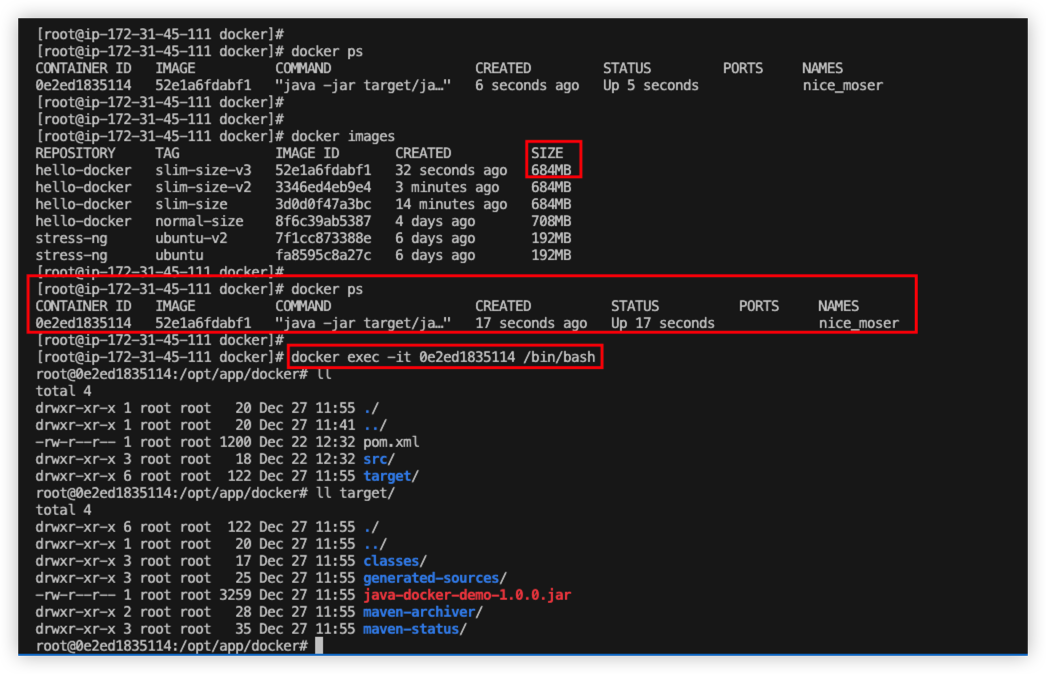
From the docker build result, we can see the size is smaller than normal version.
And it’s allow developer to run exec command to connect inside the container.
Example 3 - Try distroless and scratch
Build a tiny docker image with alpine jdk version.
1 | # Dockerfile - alpinesize-dockerfile |
From the final result, apline is the smallest version.
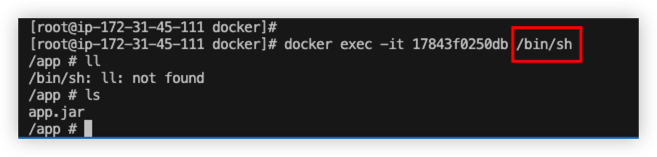
When we use alpine version, we should always use apk to mange Linux package.
Besides, we should run docker exec -it <container_id> /bin/sh to connect container.
Example 4 - Multi-stage builds
By implementing multi-stage-builds, the newest image is much smaller than previous images.

Here is comparison between single build and multi build.
| Feature | Single-Stage Build (Current Solution) | Multi-Stage Build |
|---|---|---|
| Image Layers | Single stage, more layers | Multiple stages, clear structure |
| Final Image Size | Larger (contains all build tools like Maven, JDK) | Very small (only contains the necessary JRE and JAR for runtime) |
| Build Speed | Average | Dependency separation, often faster by leveraging cache |
| Suitable Scenarios | Development/Testing environments, prioritizing simple setup | Production environment, prioritizing small image size and high security |
| Security | Lower (contains build tools, larger attack surface) | Higher (runtime only) |
Docker Layer
Example, try to build below docker file
Dockerfile
1 | FROM debian:latest |
Build command
1 | docker build -t nginx:v1 -f Dockerfile . |
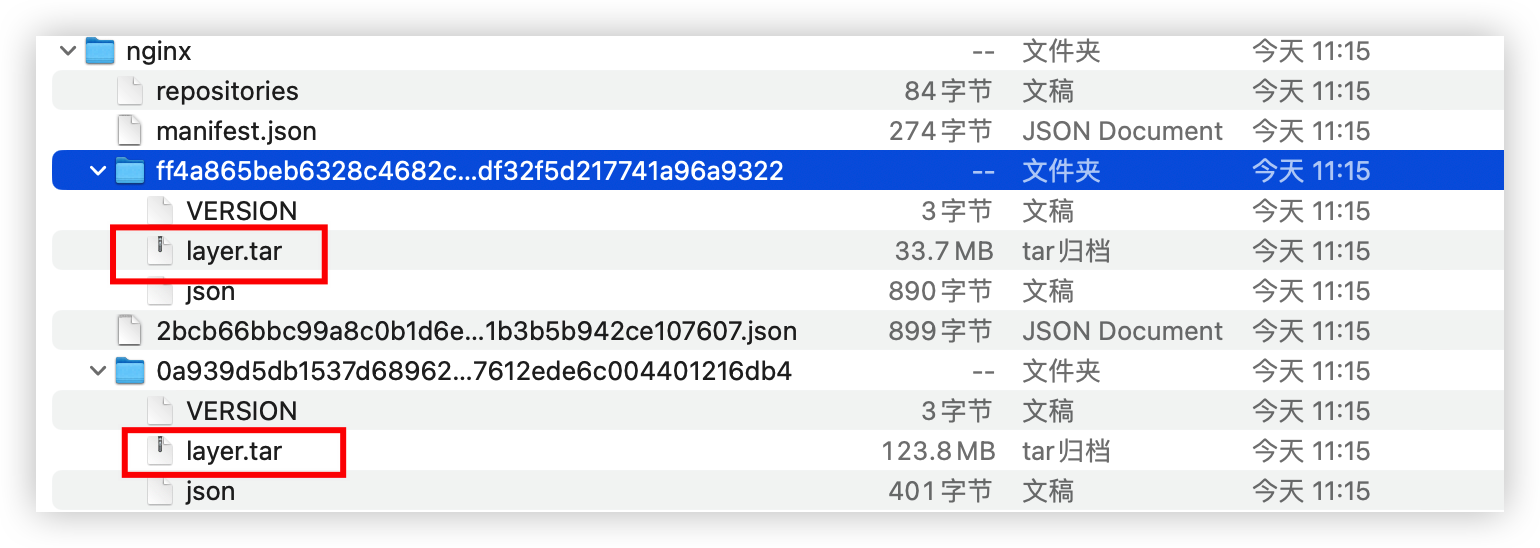
From the tar file, we can see there are 2 folder, as known as 2 layers.
- The 1st layer is file system of debian
- The 2nd layer represent the changed of nginx in debian
Actually not all docker command will generate layer.
| Instruction Type | Example Instructions | Creates a Layer? | Explanation |
|---|---|---|---|
| File System Operations | RUN, COPY, ADD |
Yes | Creates layers containing actual file contents. These are the primary contributors to the image size. |
| Configuration / Metadata | ENV, LABEL, EXPOSE, WORKDIR, USER, VOLUME, CMD, ENTRYPOINT, HEALTHCHECK, ONBUILD |
Yes, creates a metadata layer | The layers are extremely small in size and only record configuration information. |
| Build Process Control | ARG, FROM |
No | FROM references existing layers, and ARG is only effective during the build stage. |
Why we need to reduce docker layer?
- Reduce layer will make your docker image small, it can save some space.
- Less layer can improve docker pull and push efficiency.
Fewer layers result in a coarser granularity of cache invalidation; conversely, more layers make the cache more fragile.
Place content that changes infrequently (e.g., installation of basic tools) at the beginning and content that changes frequently (e.g., copying application code) at the end.
By reducing the total number of layers, you decrease the probability of intermediate layers being invalidated due to minor changes.
While merging instructions does not inherently make the cache smarter, it reduces the number of “checkpoints” that could potentially cause cache invalidation.
How to make use of layer?
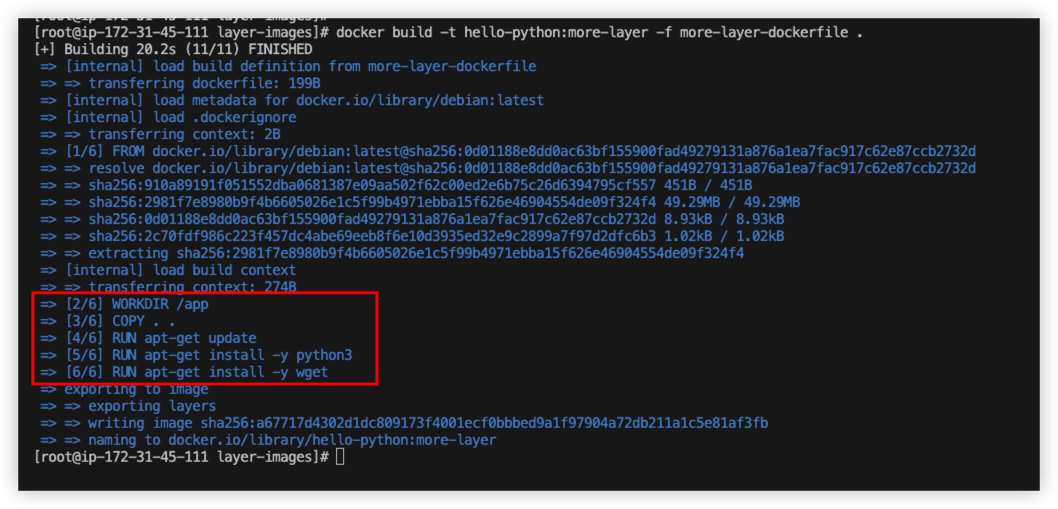
Example1 - More layer
Fille dockerfile/layer-images/mroe-layer-dockerfile
The dockerfile will generate 6 layers in total.
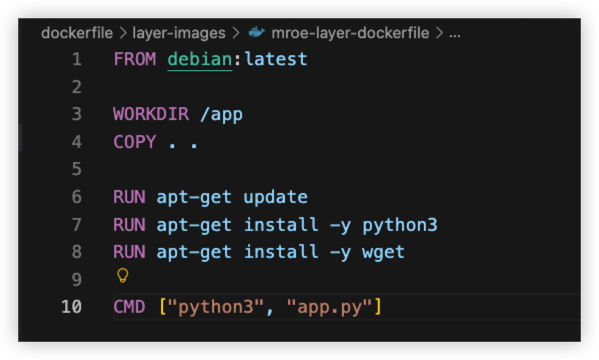
From the build result, we notice that it have 6 layer in total.
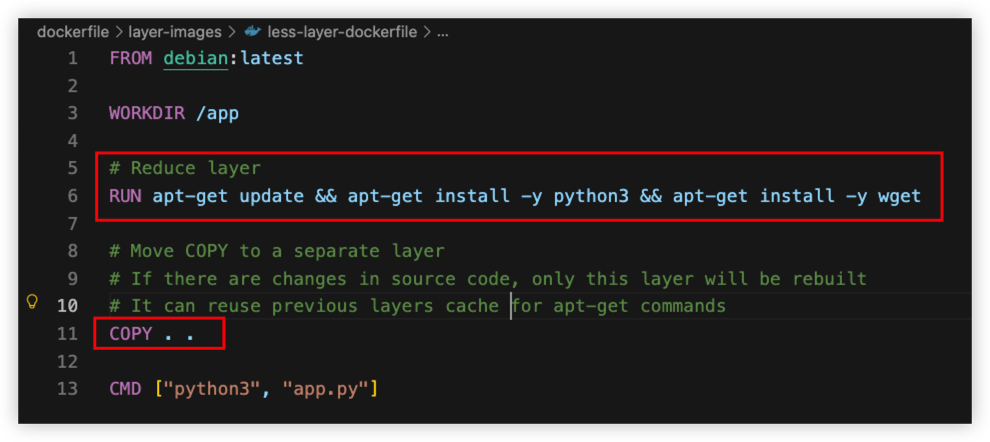
Example2 - Less layer
- Merge install command into 1 line to reduce layer
- Move
COPYcommand to lower layer to reuse upper layer cache, no need to rebuilt frequently and save build time.
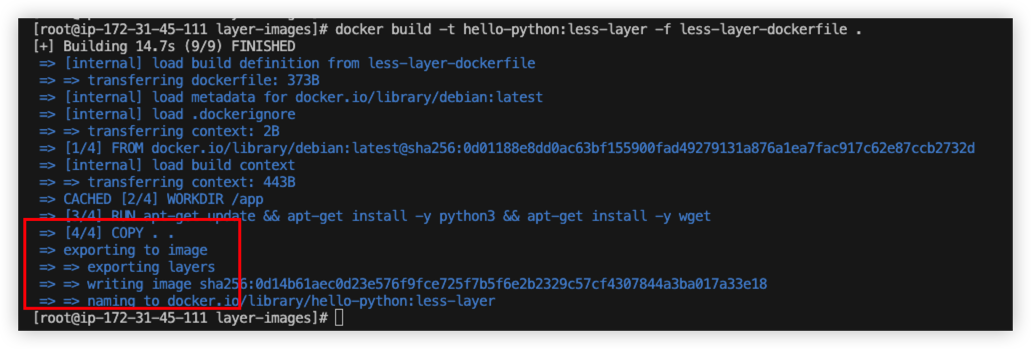
From the result, it only have 4 layers now.
Best Practise
- Use multi-stage build if possible to reduce size of images.
- Choose an appropriate base image (preferably Slim, use Alpine with caution) to reduce image size.
- Try to reduce layers if possible.
- Optimize the order of instructions: process dependencies first (since they are cacheable) and move frequently changing layers to the end (Reuse cache).
- Security - Avoid using the root user. (Specify user with
USER) - Always prefer official base images and fix the tag. (Avoid
ubuntu:latest) - Always set timezone. (Set
ENV TZ) - Always set memory for container. (Set
-m)